Understanding Different Types of Seams in Garment Construction
Time to read: 6 minutes

Seams are one of the most overlooked—yet most critical—components of garment construction.
A seam is the join where two or more pieces of fabric are held together, usually with stitches. It transforms flat fabric pieces into a three-dimensional garment. But beyond shaping, seams must also be
Load-bearing (when needed)
Durable
Comfortable
Flexible (when needed)
Compatible with the fabric type
Low profile
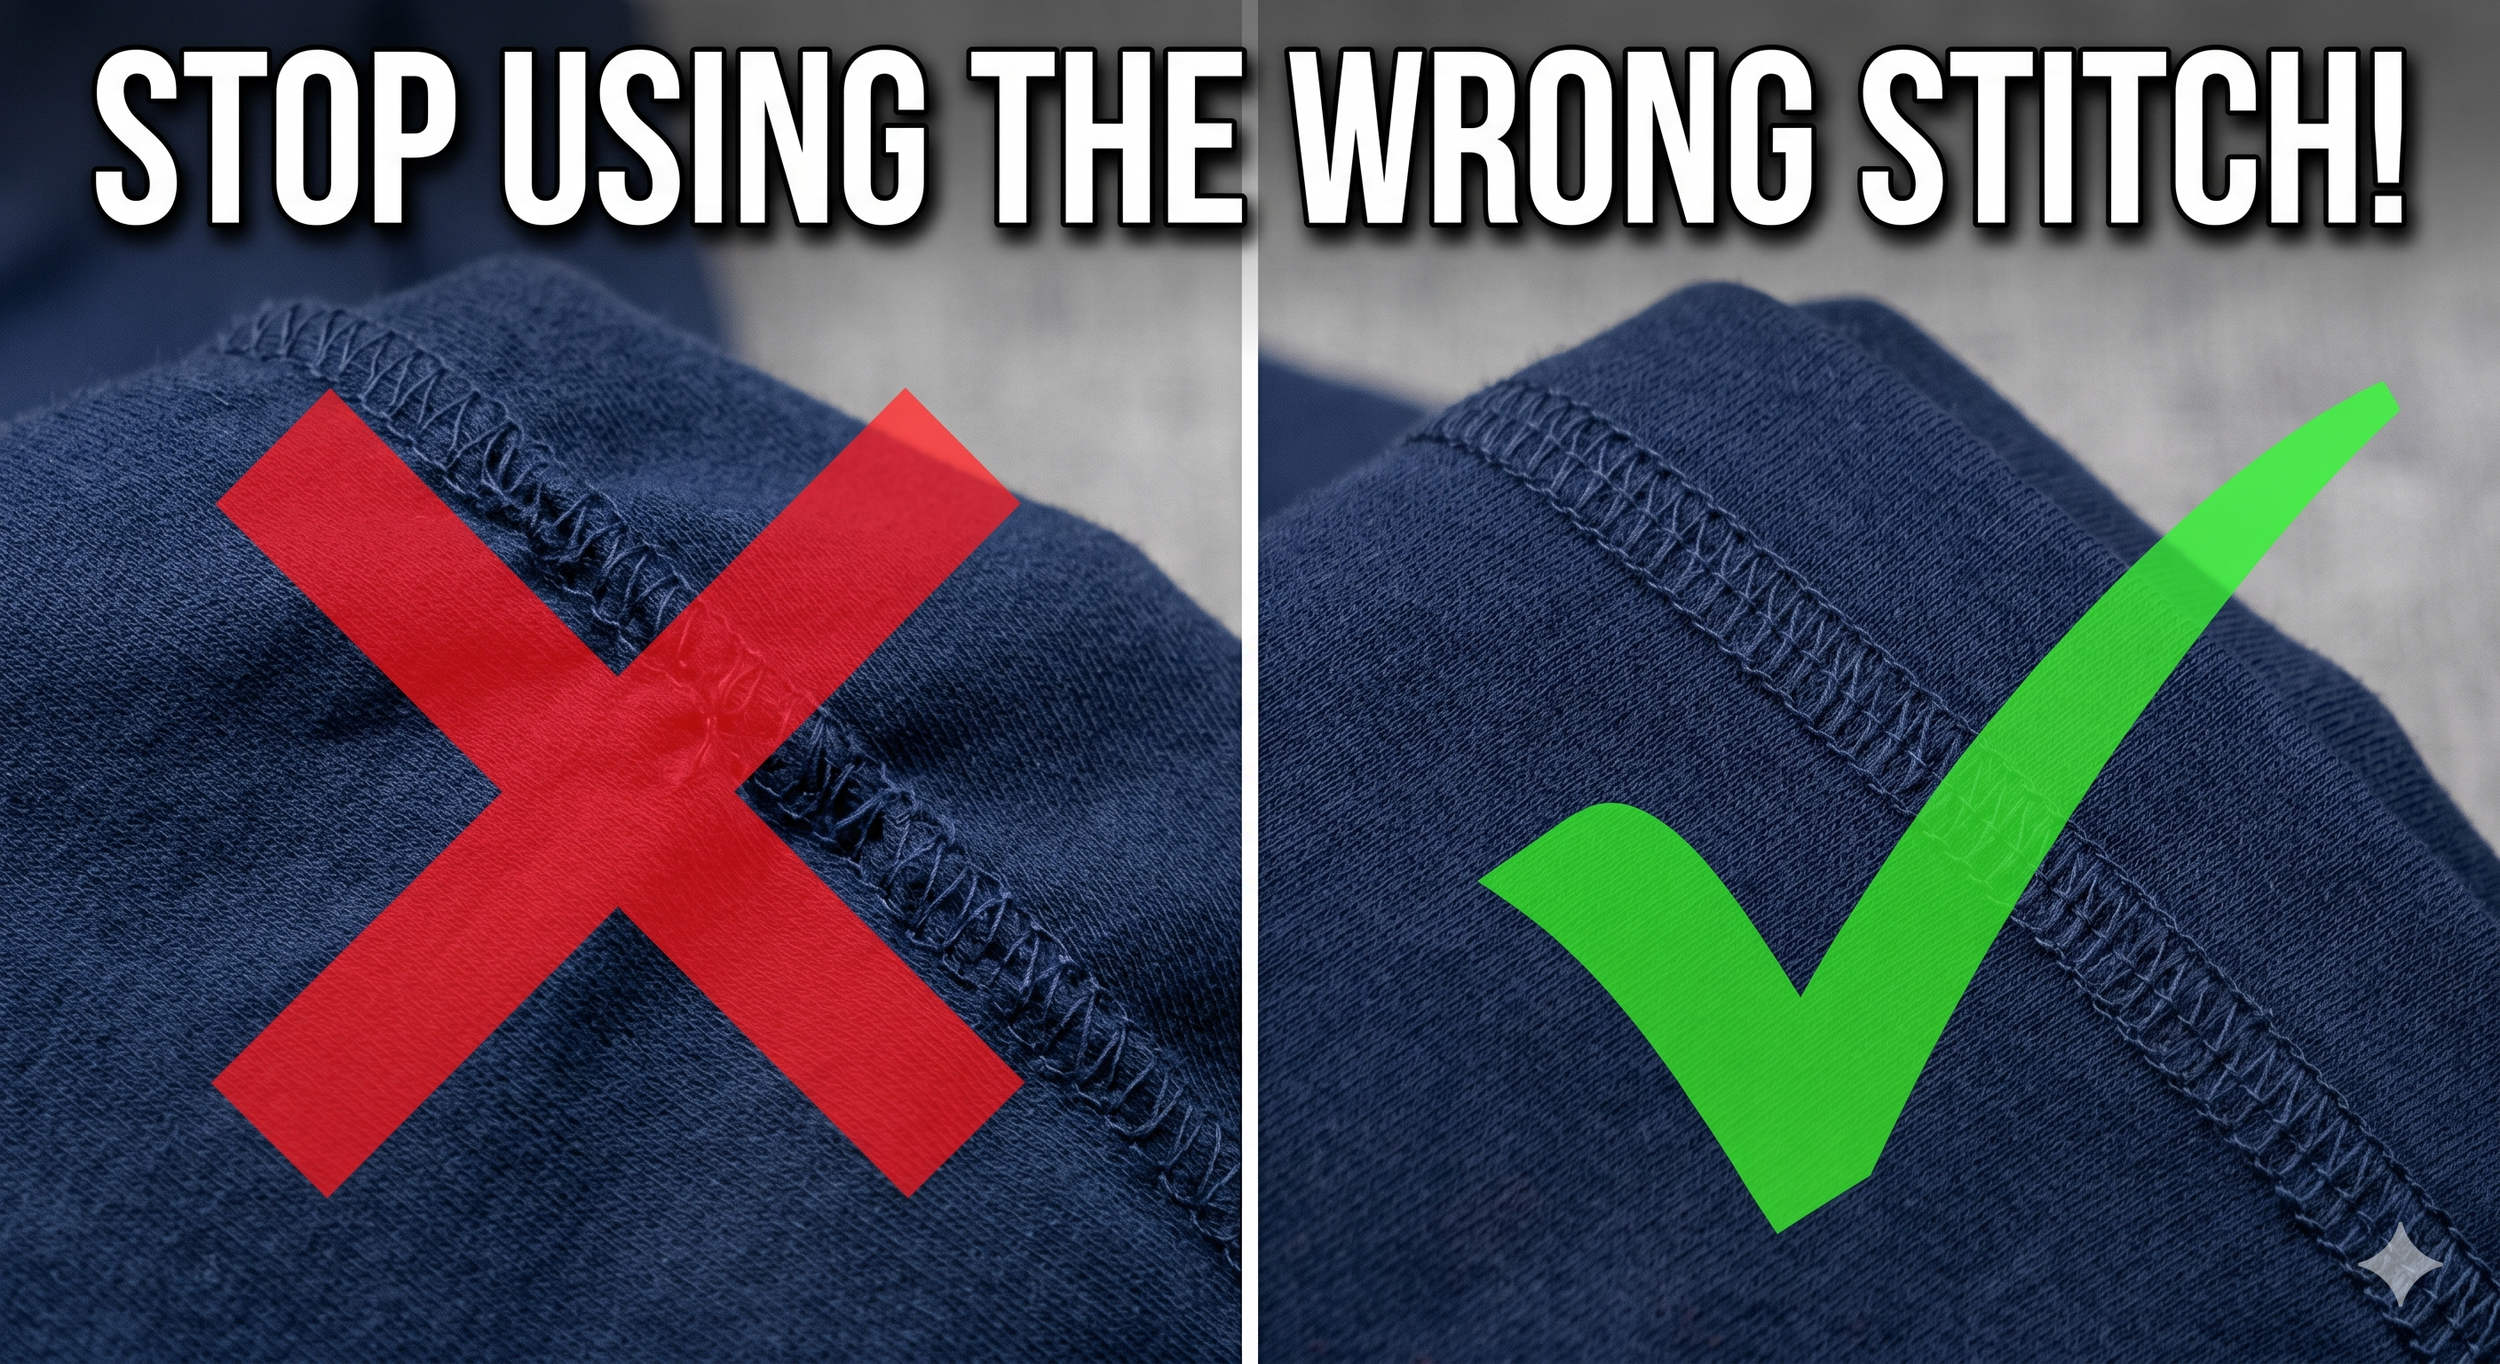
Choosing the wrong seam can lead to bulk, seam failure, poor fit recovery, or production inefficiencies.
Let’s break down the main seam types and when to use them.
How Seams Are Classified (ISO 4916 Overview)
Seams are classified under ISO 4916 into eight seam classes based on how fabric layers are joined.
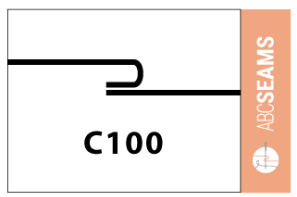
Class 1 – Superimposed Seams
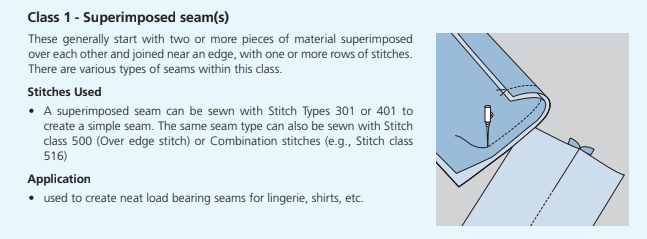
Two or more fabric layers are placed on top of each other and stitched near the edge.
Common stitches:
301 lockstitch
401 chainstitch
500 class overedge
Common uses:
Shirts
Lingerie
General garment construction
This is the most common seam class in apparel.
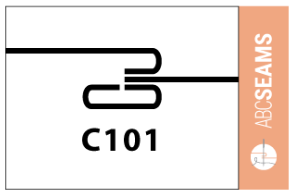
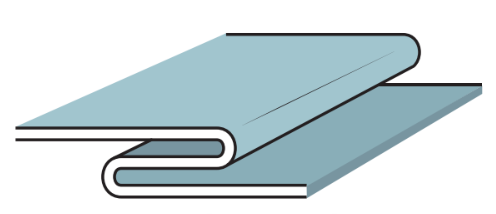
Class 2 – Lapped Seams
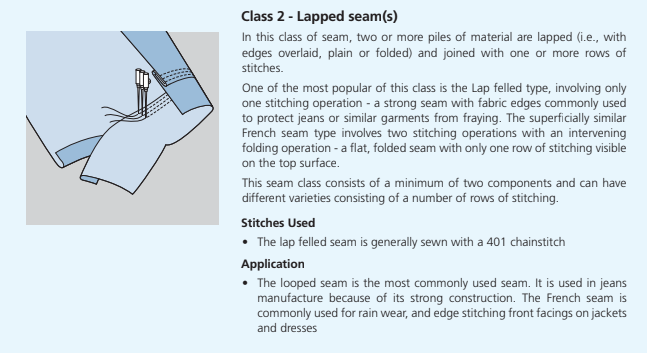
Fabric layers overlap and are stitched together.
Common uses:
Denim
Outerwear
Heavy-duty garments
These seams are strong and ideal for load-bearing areas.
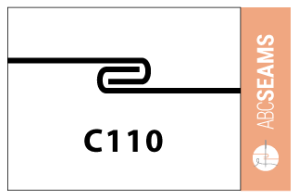
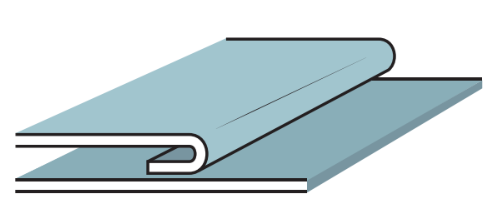
Class 3 – Bound Seams
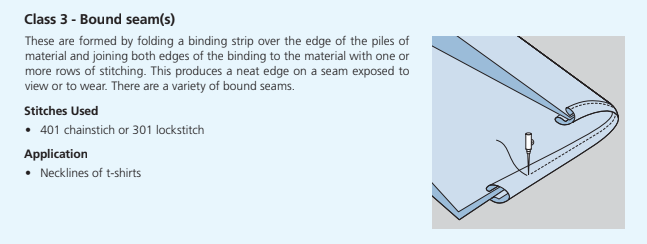
A separate binding strip encloses raw edges.
Common uses:
Necklines
Decorative finishes
Medium-weight fabrics
They create clean internal finishes and increase durability.
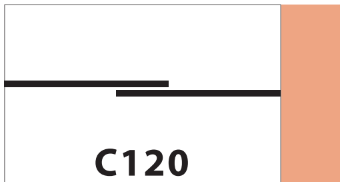
Class 4 – Flat Seams (Butt Seams)

Fabric edges meet edge-to-edge and are stitched flat.
Common uses:
Activewear
Underwear
Knit garments
They reduce bulk and improve comfort.
Class 5 – Decorative Seams

What it is: Stitching applied to one or more layers of fabric purely for visual and aesthetic purposes, rather than for structural joining.
Common Applications: Pintucks, pleats, decorative topstitching on denim pockets, or embroidery details.
Tech Pack Tip: Because these seams do not hold the garment together, their sole purpose is to look good. Your tech pack needs to be highly specific about the stitch length (SPI—Stitches Per Inch), thread weight, and thread color, as this seam is meant to be highly visible to the consumer.
Class 6 – Edge Finishing
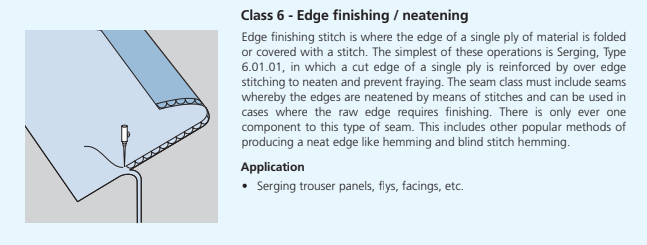
What it is: Stitching that encompasses the raw edge of a single ply of fabric to neaten it and prevent the yarns from unraveling or fraying over time. It does not join two separate garment pieces together.
Common Applications: Overlocked/serged edges on the interior seams of a t-shirt, blind hems on dress trousers, and simple folded hems on sleeves.
Tech Pack Tip: Edge finishing is a massive indicator of garment quality. A luxury tech pack might specify a bound interior edge (Class 3) instead of a basic overlock (Class 6) for a cleaner, higher-end finish.
Class 7 – Attaching Separate Items
What it is: A seam that attaches a completely separate, often non-fabric component (or an extended trim) to the edge of a garment piece. The attached item usually extends past the fabric edge.
Common Applications: Attaching elastic bands to the waistline of underwear, sewing rigid lace trim onto a hem, or attaching a woven binding braid.
Tech Pack Tip: Because you are often joining two materials with completely different properties (like rigid lace to a stretchy knit body), your tech pack can specify the correct machine folder required and tension tolerances so the factory doesn't warp or stretch the fabric while attaching the trim.
Class 8 – Single-Ply Construction
What it is: A seam created using only one single piece of fabric that is folded in on both of its outer edges and stitched together to create a continuous strap, tube, or band.
Common Applications: Belt loops on jeans, fabric waist belts, and spaghetti straps on dresses.
Tech Pack Tip: Factories use a specialized machine attachment (called a folder) to feed this single ply of fabric evenly through the machine so both edges fold perfectly. You must specify the exact finished width of the strap so they know which specific folder to attach to the sewing machine.
Common Seams Used in Apparel & Accessories
Beyond classification, here are practical seam types frequently used in production.
Felled Seam
Resistant, flexible, durable
Suitable for woven and knit fabrics
Works on straight and curved seams
Inexpensive
This seam conceals raw edges by folding them under and stitching with two rows. It’s commonly seen in denim and workwear.
Best for: Durable garments requiring strength.
Bound Seam
Strong and resistant
Decorative binding finish
Best for medium-weight fabrics
Binding encloses the raw seam edge for a clean interior look.
Welt Seam
Strong, durable
Clean, high-end interior finish
Best for lightweight fabrics
Often used in tailored garments.
Lapped Seam
Excellent flexibility
Good elongation recovery
Reduces bulk in heavy fabrics
Useful in performance and outerwear applications.
Sandwich Seam
Excellent resistance
Flexible with strong recovery
Reversible finish
Suitable for a wide variety of fabrics.
Specialty Seams You Should Know
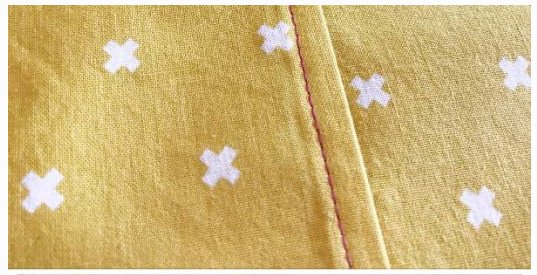
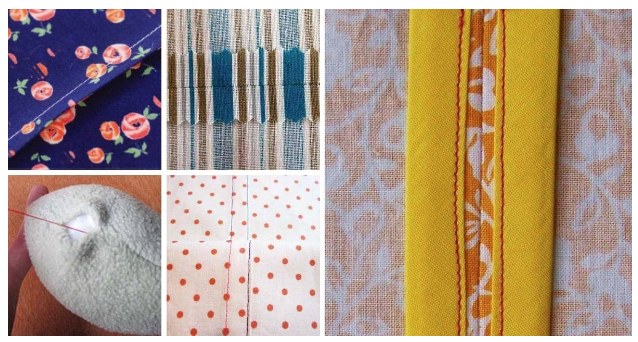
French Seam

A seam within a seam. The fabric is stitched wrong sides together first, then folded and stitched again to fully enclose raw edges.
Best for:
Sheer fabrics
Lightweight garments
Clean interior finishes
Flat Felled Seam (Single Needle)
Two rows of stitching
Concealed raw edges
Very strong
Common in jeans and workwear.
Taped Seam
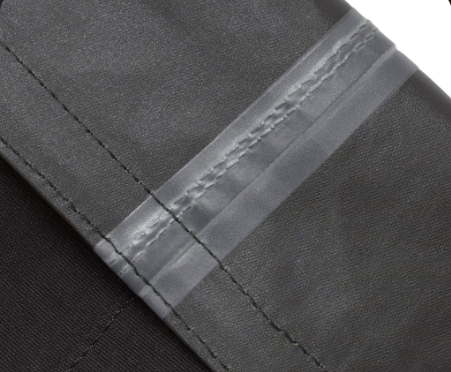
Tape is applied over a seam to:
Reinforce
Reduce stretch
Add waterproofing
Common in sportswear and outerwear.
Butt Seam
Edges meet without overlap and are stitched using coverstitch machinery.
Best for:
Underwear
Performance knits
Low-bulk construction
Hems & Edge Finishes
Hems fall under edge finishing (Class 6).
H110 – Fold Hem
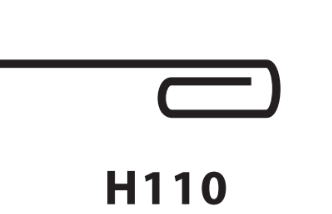
Most popular hem for wovens
Durable and neat finish
Suitable for most fabrics
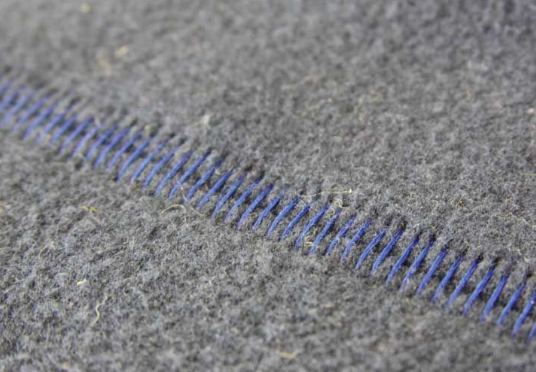
H101 – Bound Hem

Very strong
Prevents ravelling
Adds decorative weight
H200 – Bound Edge
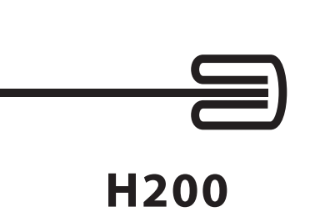
Reinforces and protects edges
Decorative and functional
H000 – Unhemmed Edge

Low cost
Flexible
Used in casual or raw-edge designs
Structural Details That Affect Seams
D110 – Pleat
Adds volume and flexibility. Often reversible.
D210 – Patch
Adds strength and reinforcement to high-stress areas.
Seam Quality: What Brands Should Monitor
Seam performance can be evaluated by:
1. Seam Strength
What it is: The amount of physical force or tension a seam can withstand before it either rips open or the thread snaps.
Why it matters: If your seam strength is lower than the strength of the fabric itself, the garment will fall apart under normal wear and tear.
How to control it: Seam strength is determined by three things: the type of thread used (e.g., polyester core-spun vs. cotton), the Stitches Per Inch (SPI), and the seam type. Heavy-duty garments like jeans require high-strength construction like a Felled Seam paired with a thick thread and a dense SPI.
2. Seam Slippage
What it is: This happens when the actual thread doesn't break, but the yarns of the woven fabric pull away from the stitching under tension, creating a visible gap, laddering, or a hole right next to the seam.
Why it matters: This is a massive quality control issue, especially common in loosely woven fabrics, smooth synthetics, or delicate silks. It makes a garment look cheap and damaged instantly.
How to prevent it: If you are using a slippery or loose fabric, you can prevent slippage by increasing the seam allowance, using a French Seam to trap the raw edges, or applying a lightweight fusible interfacing along the seam line to reinforce the yarns.
3. Seam Width and Depth (Seam Allowance)
What it is: This refers to the distance between the raw edge of the fabric and the actual line of stitching (often called the seam allowance).
Why it matters: If the seam width is too narrow, the fabric will fray, and the seam will blow out. If it is too wide, the seam will feel stiff, bulky, and alter how the garment drapes on the body.
How to control it: Standard internal seams usually have a 3/8" or 1/2" width, while tailored garments might use up to 1" so the customer can alter it later. Your tech pack and digital patterns must state the exact seam width so the factory knows where to align the fabric under the needle.
4. Bulk and Comfort
What it is: The physical thickness and stiffness of a seam when multiple layers of fabric are folded and stitched together.
Why it matters: Excessive bulk destroys comfort. If you have a bulky seam at the armhole or inner thigh, it will cause severe chafing. Bulk also ruins the aesthetic of a garment by creating weird, lumpy ridges that show through to the outside.
How to fix it: Technical designers reduce bulk by "grading" the seams (trimming the hidden layers of fabric to different widths), pressing seams flat and open, or using a Lapped Seam (which reduces the number of fabric layers stacked on top of each other).
5. Stretch and Recovery
What it is: * Stretch is the seam's ability to elongate at the exact same rate as the fabric when pulled.
Recovery is the seam's ability to snap back to its original length without the stitches popping or staying stretched out (often called "bagging out").
Why it matters: If you sew a highly stretchy knit fabric (like yoga pants) with a rigid, non-stretch straight stitch, the thread will snap the second the customer pulls the pants over their hips.
How to control it: For activewear, swimwear, and knits, you must specify stretch-friendly stitches in your tech pack, such as an overlock, coverstitch, or zigzag stitch. You also need to specify "looper" threads (like Woolly Nylon) that naturally stretch with the garment.
Why Seam Selection Matters in Product Development
Seam choice impacts:
Durability
Fit and comfort
Production cost
Bulk
Fabric compatibility
Garment longevity
Using the wrong seam can:
Increase production costs
Cause seam failure
Lead to return issues
Complicate sewing
This is why seam specifications must be clearly documented in your tech pack.
Conclusion
Seams are far more than just aesthetic stitching details; they are fundamental structural decisions that dictate a garment's quality and lifespan. A solid understanding of different seam types allow you to engineer stronger, higher-performing garments while strategically reducing fabric bulk in critical areas for maximum comfort. Ultimately, mastering these constructions empowers you to communicate your technical requirements clearly to your manufacturing partners, ensuring a flawless finish and preventing costly production errors before they happen.
In garment construction, seams are where design meets engineering. Choosing the right seam type is only useful if it’s clearly documented and communicated to your manufacturer.
At Tech Packs Co, we help brands translate design intent into production-ready tech packs—including seam construction, stitch types, finishes, and material specifications. Strong garments start with clear construction. Book a consultation with us and build with precision.


Author Bio
Tech Packs Co founder Belinda is a technical fashion designer from London, now based in Los Angeles. Belinda had her first job in fashion at the age of 15, fixing swatch cards together. Since then, Belinda has been designing & creating tech packs for more than a decade... for household name brands and independent designers alike.